The Windsor knot, often called the Full or Double Windsor, is a popular method for tying a necktie, known for its large, symmetrical, and triangular shape. It’s considered a classic choice, creating a knot that conveys a sense of power and authority.
What is the Windsor Knot?
The Windsor knot, frequently recognized as the Full Windsor or Double Windsor, is a distinctive method of tying a necktie that produces a substantial, symmetrical, and triangular knot. This knot stands out due to its larger size and balanced appearance, which makes it a popular selection for individuals aiming to project a sense of authority and confidence. Its construction involves a more intricate series of steps compared to simpler knots, resulting in its characteristic full and robust form. Often chosen for formal occasions, the Windsor knot adds a touch of sophistication and is considered a staple in the realm of men’s fashion, signifying a refined and polished look.
Origins and History of the Windsor Knot
The Windsor knot gained popularity as people sought to emulate the Duke of Windsor’s style, aiming to achieve a larger knot with standard-thickness ties. It’s a knot that has become synonymous with classic style.
The Duke of Windsor’s Influence
The Windsor knot is widely associated with the Duke of Windsor, though he didn’t actually invent it. The public created this knot, attempting to imitate his preference for a large, substantial knot. He favored a wider knot, which he achieved by using thicker fabrics or specially lined ties. The Windsor knot was an adaptation that allowed others to get a similar look with standard neckties. It became a symbol of his sophisticated and elegant style, leading to its widespread adoption. The Duke’s influence on men’s fashion solidified the Windsor’s place in sartorial history, forever linking it to his name.
Popular Misconceptions about the Knot
Despite its association with the Duke, a common misconception is that he personally invented the Windsor knot. It was actually created by the public to mimic the appearance of his ties. Another misunderstanding is that the Windsor is the same as the Double Windsor, though they are essentially the same knot. Some also believe it is the only knot suitable for formal occasions; however, other knots like the four-in-hand are still acceptable. Finally, it’s often mistakenly thought that the Windsor requires a lot of effort to tie, when with practice it can be completed quickly and efficiently.
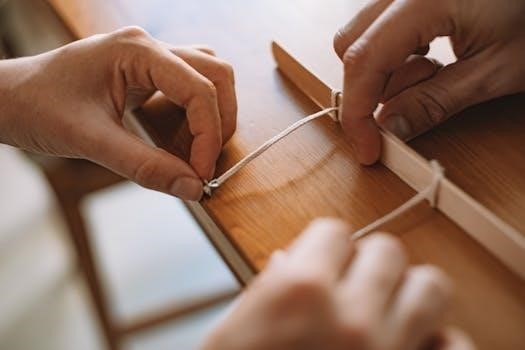
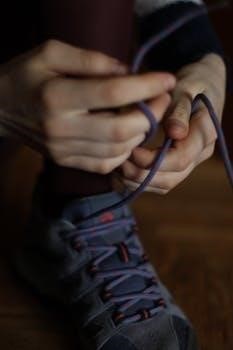
Step-by-Step Guide to Tying a Windsor Knot
Tying a Windsor knot involves a series of precise steps. Beginning with the correct tie positioning, it continues through creating the cross, completing the knot, and finally, adjusting it.
Initial Tie Positioning
To begin tying the Windsor knot, drape the tie around your neck, ensuring the shirt collar is raised and buttoned. Position the wide end of the tie on your right side, extending significantly lower than the narrow end, typically around 14 inches (35 cm) below. The narrow end should rest slightly above your belly button. This initial placement is crucial because it determines the final length of the tie and the overall look of the finished knot. Failing to correctly position the tie can make the knot too short or long. This starting point sets the stage for a perfectly executed Windsor knot.
Creating the First Cross
With the tie positioned correctly, the next step involves creating the first cross. Take the wide end of the tie and bring it across the front of the narrow end, moving from right to left. This initial cross is the foundation for the symmetrical shape of the Windsor knot. Ensure the wide end is firmly placed over the narrow end, forming a neat X shape just below your chin. This step is crucial for the subsequent steps and the final formation of the knot. Without a proper cross, the Windsor knot cannot be achieved successfully, so be precise during this step.
Completing the Knot
After forming the initial cross, continue to complete the knot by bringing the wide end up and through the loop around your neck from underneath. Then, take the wide end and bring it down through the front loop you’ve just created. This step starts to form the bulk of the knot. Pull the wide end down firmly but gently, allowing the knot to begin to take shape. Ensure the wide end passes through the loop without twisting or bunching. This step is essential for the knot’s final appearance, making it symmetrical and clean.
Tightening and Adjusting the Knot
With the wide end passed through the front loop, carefully tighten the knot by holding the knot with one hand and gently pulling down on the wide end with the other. Ensure the knot is snug against your collar, but not too tight that it feels restrictive. Use your fingers to make small adjustments, ensuring the knot is centered and symmetrical. Smooth out any wrinkles or creases around the knot to give it a polished look. The goal is to achieve a smooth, firm knot that sits comfortably and looks professional.
Variations of the Windsor Knot
While the full Windsor is the most common, there exists a variation called the Half Windsor. It is smaller and less symmetrical, providing a different style for your tie.
Full Windsor vs. Half Windsor
The primary distinction between the Full Windsor and the Half Windsor lies in their size and symmetry. The Full Windsor, also known as the Double Windsor, is larger, more triangular, and perfectly symmetrical. It’s a knot that projects a sense of formality and is often chosen for important meetings or occasions where a strong, confident image is desired. In contrast, the Half Windsor is a smaller knot and slightly asymmetrical. The Half Windsor is a good option when one wishes to achieve a classic look that isn’t as imposing as its full counterpart. It requires less tie length and is easier to execute while still maintaining a professional appearance. Choosing between them often depends on personal preference, collar size, and the desired level of formality.
When to Wear a Windsor Knot
The Windsor knot, with its larger size and formal appearance, is best suited for occasions requiring a higher level of formality, such as important business meetings and formal events.
Formal Occasions and Meetings
The Windsor knot is a distinguished choice for formal occasions and important business meetings where projecting confidence and authority is key. Its substantial and symmetrical form conveys a sense of seriousness and professionalism. The knot’s bold presence makes it suitable for events where making a strong impression is necessary. When attending events like weddings, galas, or high-stakes negotiations, the Windsor knot helps to complete a polished and sophisticated look. It is the perfect knot for environments where attire is expected to be neat, respectful, and powerful. Opt for the Windsor when the goal is to command respect and display an air of self-assurance.
Appropriate Collar Types
The Windsor knot’s significant size and triangular shape make it most suitable for shirts with wide-spread collars. These collars provide ample space to accommodate the knot’s bulk without causing the collar to pinch or buckle. Cutaway or English spread collars are ideal companions for the Windsor, ensuring a balanced and proportionate look. The wider spacing between the collar points allows the knot to sit comfortably, showcasing its full, symmetrical form. A smaller collar will struggle with a Windsor knot and cause it to look bulky or ill-fitting. When selecting a shirt for a Windsor, always choose one with a wide-spread collar to maintain a harmonious and refined appearance.
Other Tie Knots to Consider
While the Windsor is popular, the four-in-hand knot is a simpler alternative. It is a great starting point for beginners and works well with various shirt collars.
The Four-in-Hand Knot
The four-in-hand knot is a popular, simple, and asymmetrical tie knot, often recommended for beginners learning how to tie a tie. It’s considered one of the easiest knots to master, making it a great starting point for those new to neckwear. It requires minimal steps and can be tied quickly, which contributes to its everyday appeal. Unlike the larger Windsor, the four-in-hand knot is smaller and slightly elongated, making it suitable for most shirt collar types. Its simplicity and versatility allow it to be worn in a wide range of settings, from casual to semi-formal, showcasing its adaptability. This knot is a go-to option for many due to its ease and classic look.
Tips for a Perfect Windsor Knot
To achieve a flawless Windsor knot, ensure symmetry by carefully adjusting the tie throughout the process. Smooth out any creases and aim for a clean, classy appearance, paying attention to creating a dimple.
Ensuring Symmetry and Smoothness
Achieving a symmetrical Windsor knot requires attention to detail throughout the tying process. Start by ensuring both sides of the tie are evenly positioned before you begin. As you create the knot, make sure each wrap and tuck is done with precision. Avoid any twisting of the tie fabric that might lead to an uneven knot. After completing the knot, carefully smooth out any wrinkles or creases. Pay close attention to the shape, making sure the knot is balanced and forms a clean triangle. This attention to symmetry and smoothness is key to a polished and professional look.
Achieving a Dimple
A dimple in your Windsor knot adds a touch of elegance and sophistication. To achieve this, as you tighten the knot, use your index finger to create a small indent just below the knot. Hold the dimple in place while continuing to tighten and adjust the knot, using both hands. Be careful not to pull too tightly, as this can flatten the dimple. Instead, aim for a gentle tightening that maintains the crease. The dimple should be centered and should complement the shape of the Windsor knot. With practice, creating a dimple will become a natural part of your knot-tying routine.